- Home
- Butterfly in Oils
How to Paint a Butterfly from Wings to Canvas
Have you ever wanted to learn how to paint a butterfly? Many artists are inspired by the enchanting butterflies.
The painting tips and techniques below will set you on the road of painting butterflies.
This painting uses the basics of oil painting that you may use for more butterflies or any other subject.
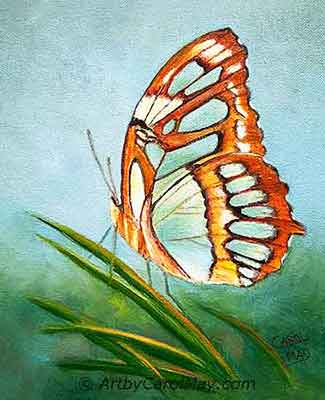 Paint a butterfly step-by-step.
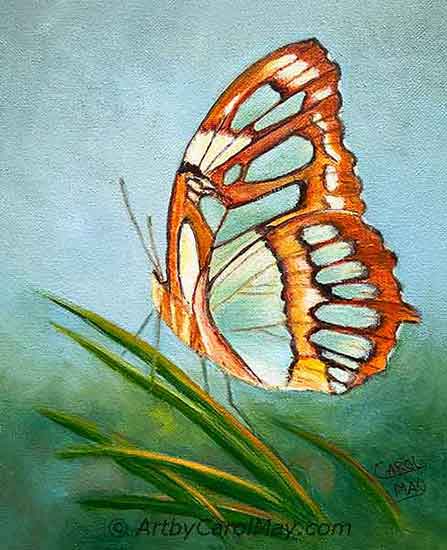 Paint a butterfly step-by-step.
What Do We Need for This Butterfly Painting?
This painting tutorial is tailored for oil and alkyd paints. Acrylics use much the same steps. Watercolor artists have three butterfly tutorials on this website, so it's time for the oil painters.
What Are Alkyds?
Alkyd paint is manufactured with the same pigments as oil paint. Oil paint mixes the pigments with linseed oil. Alkyds have the pigments mixed with alkyd resin.
Alkyds are used like oil paint. The finished painting looks just like an oil painting. There is no discernible difference. But there are distinct advantages to alkyds.
Alkyds are workable for several hours. They dry completely within 24 hours. Griffin Alkyds by Winsor & Newton have a good painting consistency, so they don't require any painting medium. Mineral spirits is used for underpainting and cleaning brushes.
A Simple Color Palette, Canvas and Brushes
Color is awesome! It is one of the great joys of painting, but it's easy to get carried away with too many colors. This butterfly painting uses only 3 colors. How do we choose colors for a painting?
- Burnt Sienna
- Cadmium Yellow
- Phthalo Blue
- White, it doesn't count as a color.
Oil painting is normally done on stretched canvas. But canvas panels are great for learning how to paint a butterfly. Plus, they are less expensive for practice painting.
- 8x10" canvas or panel
- 1/2" angle or bright brush
- #6 round
- #6 flat
More about oil painting supplies here.
Reference Material
Butterflies don't stay on the flowers long enough to be painted. So, unless we happen to have a mounted butterfly, photos are our best option.
We will be painting one of the few green butterflies, the beautiful Malachite Butterfly. The top side of their wings can be very green and sometimes the brown looks black.
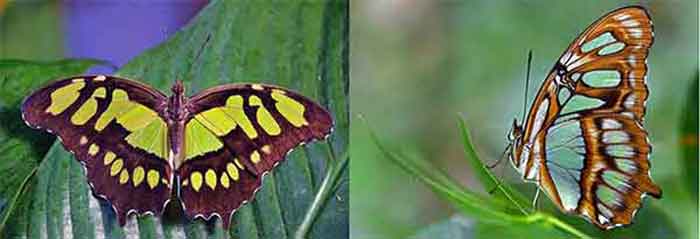 The beautiful green Malachite Butterfly
We will be painting the underside of the wings where the green looks more turquoise.
i have never had the privilege of seeing a Malachite Butterfly in real life. There seems to be a variation of the colors in different photos. Most of the photos I saw lean towards turquoise on the underside of the wings, so that's how I painted it.
You certainly may paint them greener. It's a matter of individual preference. Different photos also showed a variation in the shape of the colored spots.
Nature is not perfect; this relieves our minds when we are drawing the butterfly.
See a larger view of the Malachite Butterfly.
Getting Ready to Paint the Butterfly
Draw the butterfly on the canvas. The drawing will include the main color patterns and a few veins. My favorite way is to do the drawing on paper first. Then transfer it to the canvas with graphite paper.
Good composition very seldom centers the main subject. Position the butterfly on the canvas with various areas around it for the background.
Paint the Dark Colors
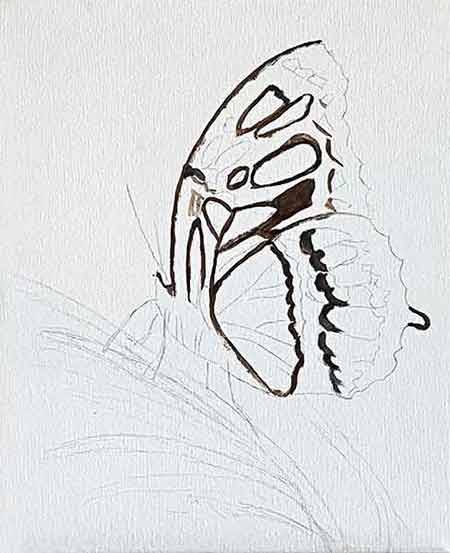 Paint the dark browns or black.
Refer to the reference photo and identify the darkest colors.
Mix blue and orange to get the dark color of your choice. More orange (Burnt Sienna) in the mixture will create brown. More blue in the mixture will make a black.
Thin the dark mixture with your medium. Oil paint may be thinned with linseed oil. Gamsol, an odorless mineral spirits is perfect for thinning alkyd paint.
Paint the dark colors using a round brush. The lines don't have to be perfect.
Relax and
enjoy painting. That's how to paint a butterfly.
How Do We Use Oil Paint?
There are two basic guidelines for using oil and alkyd paints.
- Paint 'dark to light'. Paint the dark colors first. Highlights are painted last.
- Paint 'thin to thick'. The first paint layer is thinned with medium. As the painting progresses, use less thinner. The final layers are straight paint.
This may also be called 'fat over lean' because the first layer is thinned paint. The last layer is called fat because oil paint is made with linseed oil.
How to Paint a Butterfly
Let's starting painting the first color. Mix yellow and blue for the large color spots on the butterfly's wing.
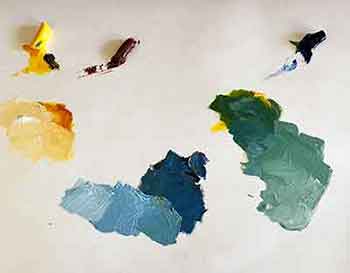 Start mixing the wing colors.
Depending on our artistic preferences, mix a green using more yellow. Or use more blue to get a turquoise color.
How do we mix the color?
- Start with yellow.
- Add a little bit of blue.
- Mix the white in last.
Mix in white to get a range of tints of your color. Add the white only after the green or blue has been mixed to your satisfaction.
Use only enough medium to make the paint flow. This layer is a little thicker than the darks, but it is not thick, gloppy paint.
Notice we can still see the drawing of the veins in the large spot.
Thick paint would make it difficult to paint the veins in a later step.
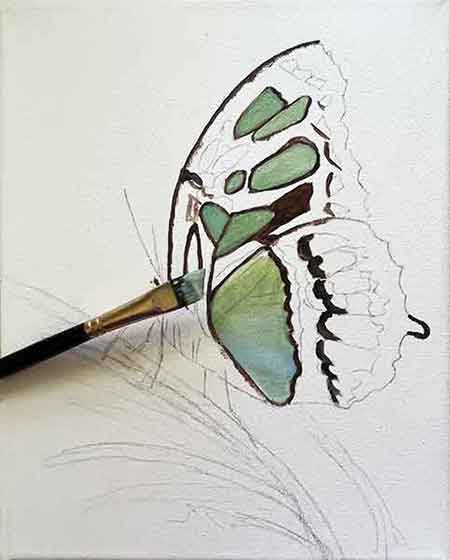 Compare the brush size to the subject size.
I enjoy using an angle brush for painting the small spaces. The pointed tip may be used for small touches and the full edge is great for getting a straight edge.
A flat brush will work just as well. It's just a matter of personal preference.
Contrast Brings Our Paintings to Life
Paint with variety and contrast. That's how to paint a butterfly.
Light and Dark Values:
Aside from composition, values are the most important principle of painting art. Values are the light or darkness of a color.
Imagine a solid grey flag. Now think of a black and white flag. Which flag would attract the most attention? Obviously the black and white flag. Contrasting values attract attention.
Complimentary Colors:
Do colors have different values? Yes, they certainly do. Yellow is the lightest color and purple or violet is the darkest value. (Technically black is not a color, it is actually the absence of color.)
What if we want value contrast in our painting, but we are not using yellow or violet?
Then we use complimentary colors. Colors opposite on the color wheel have a large value difference.
Small versus Large:
Imagine the size difference between a large St. Bernard dog and a little Chihuahua. If they are trotting down the street beside each other, they are an attention getter, right?
The same
hold true when we are painting an art piece. The contrast between small and large
parts of the painting grabs our attention.
How to Paint a Butterfly with Contrasts
The black veins and trim versus the light colors on the wings are contrasting values.
The wings have complimentary colors.
Small delicate veins and patterns contrast in size to the colored areas on the wings.
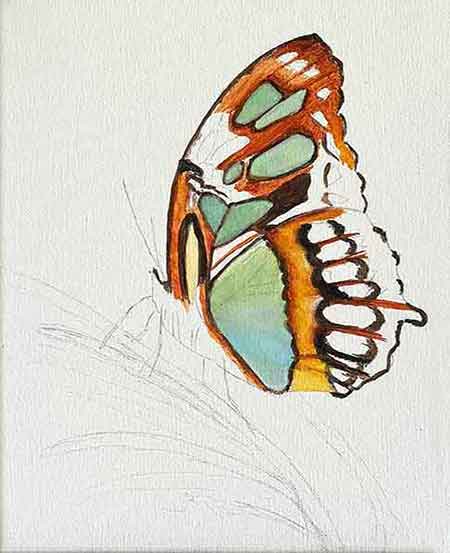 Blue and orange are complimentary colors.
Continue painting all the colors while referring to the reference images. Nobody is perfect and we may make mistakes while we are painting.
Can We Correct Mistakes?
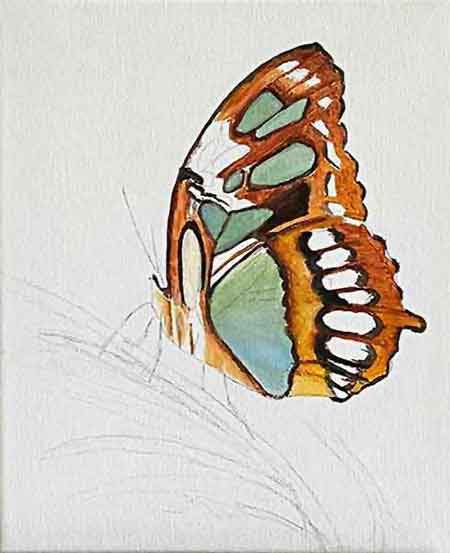 The bottom, left white spot was corrected.
When we make a mistake rub it off immediately. Use a paper towel or a clean brush dampened with mineral spirits to lift the paint.
If the paint is dry, it's easy to paint over.
The Butterfly Needs a Perch
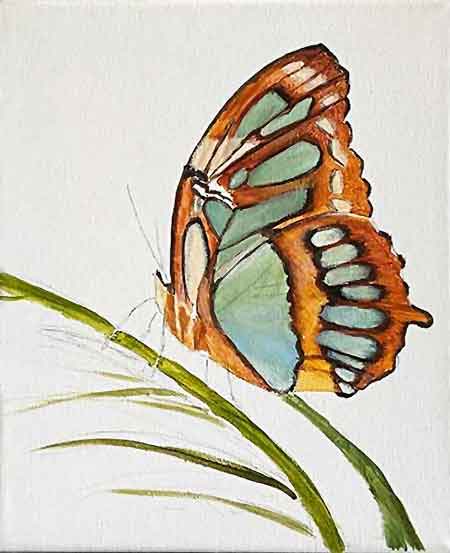 Give the butterfly something to sit on.
Use moderately thin paint to finish painting the butterfly colors. The thin paint allows the veins to be seen, so we can paint them later.
Then give the butterfly a resting place.
Set the Butterfly into a Background
Now is a good time to start on the background. That will give the butterfly time to dry some before we paint the veins.
You may want to paint a house or flowers in the distance. But since this is how to paint a butterfly, we will keep the background simple with just sky and grass.
A simple background provides a relief from the intricate patterns of the butterfly. That introduces another contrast into the painting.
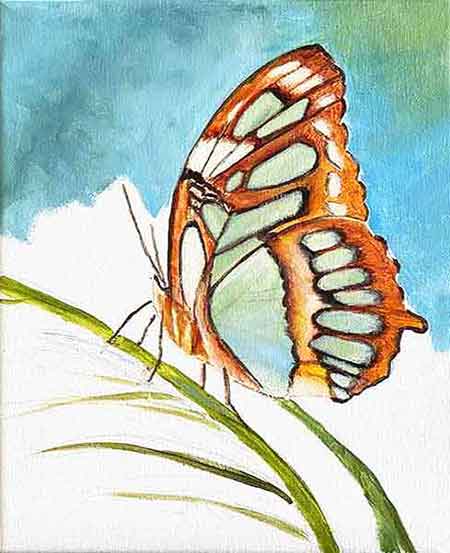 Start painting the sky.
Mix blue with a little Burnt Sienna to dull the blue, then add white.
Paint the antennae and legs with thinned paint. We don't want to lose them in the background.
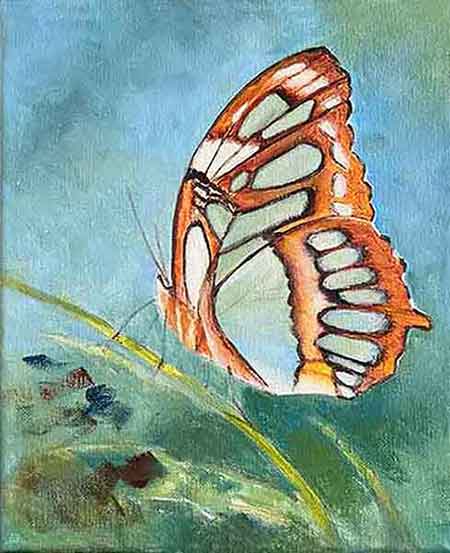 Paint around the grass.
Let the legs and antennae dry before painting around them.
We may place colors on the canvas and then paint them together, instead of mixing on the palette.
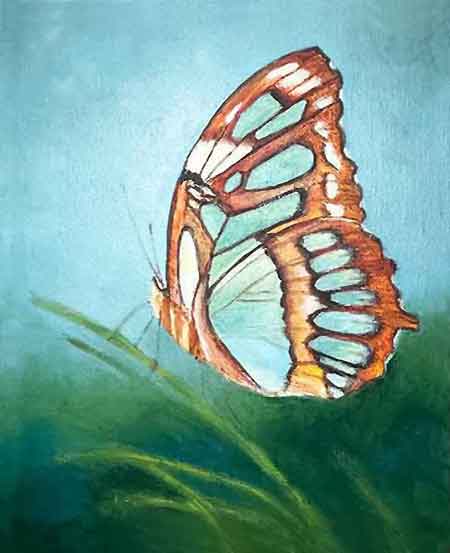 Finish the background.
The sky was lightened so it is not competing with the butterfly.
Paint around the grass blades until the final step. The background may be smoothed or left rough.
Darker colors in the lower part of the painting help ground the butterfly into the painting.
Finishing the Butterfly Painting
Look over the painting and see what you would like to adjust.
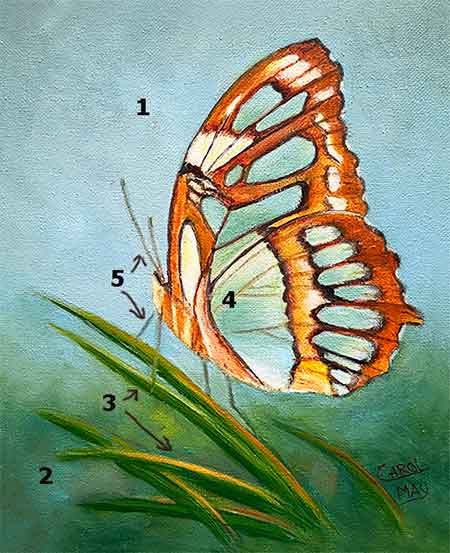 Paint the antennae, legs and veins.
The finishing touches were:
- The sky was lightened again to make the butterfly stand out more.
- The grassy background seemed too heavy, so it was lightened also. Paint it with some color variations. Tie the painting together by including some turquoise and burnt sienna butterfly colors.
- Paint a dark green on the underside of the grass blades. Then highlight them with light green or butterfly colors.
- Thin a dark color and use a round brush with a very light touch to paint the veins. We may paint every vein on the butterfly. Or we may leave some veins unpainted for the viewer's imagination.
- Also, paint the butterfly's antennae and legs. Butterfly antennae have a little knob on the tip. You may wish to give the butterfly a tiny dark eye. There didn't seem to be one showing in the reference photo.
Just paint step-by-step and soon your butterfly painting will be ready for a signature.
Hurray! That's how to paint a butterfly.


 Create stunning beach art with this step-by-step tutorial. A comprehensive guide on how to paint a beach. It only takes five colors to paint this seascape. Learn the steps of painting the easy backgro…
 Are you new and want to learn how to paint art? On this page, you’ll find ideas of what to paint, the supplies we really need, the fundamentals of good art (values, color, composition), and beginner-f…
 Are you eager to learn how to oil paint? What are the essential supplies for oil painting? What do we need for clean-up and how long do oil paintings take to dry? Learn the rules of oil painting and t…