- Home
- Paint a Giraffe
Paint a Giraffe Your Way - Choose from 3 Styles
Learn how to paint a giraffe with watercolors.
Painting is an expression of the artist. Choose your style from one of the following step-by-step tutorials.
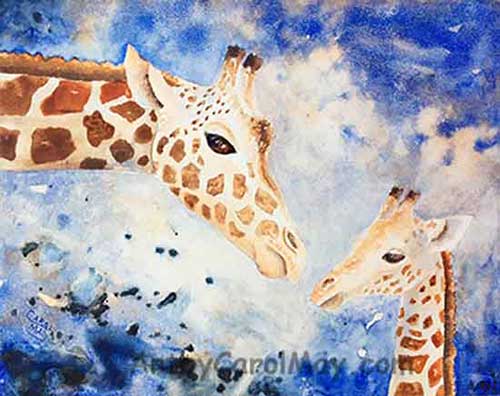
- A traditional giraffe painting of a mother giraffe showering love on her baby. It is painted with the normal watercolor painting techniques.
- A colorful, fun
giraffe painting is not the normal giraffe. Choose your own colors, such as pink, yellow or purple. This watercolor painting uses the fun technique of pouring the colors. Give it a try!
- A quick, easy giraffe painting. Watercolor painting does not have to take much time. This an easy painting in traditional giraffe colors that was painted to get a point across.
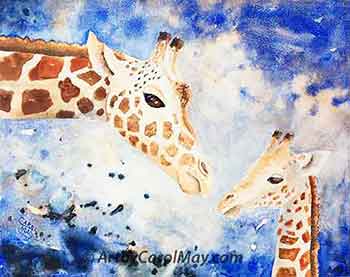 "Mother's Love"
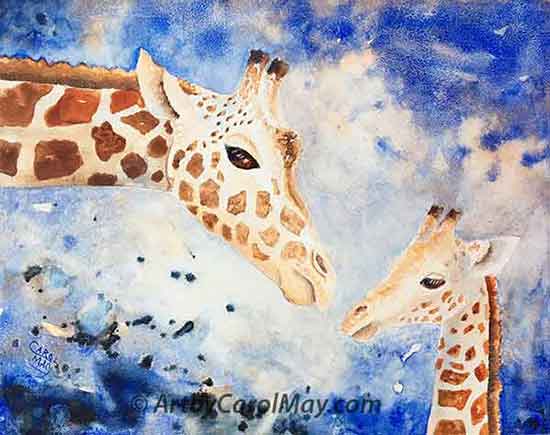 "Mother's Love"
Get Ready to Paint a Giraffe
The preparations are the same for any watercolor painting.
Choose your painting surface.
Traditionally watercolors are done on paper. Modern technology has given us additional options for watercolors.
We may paint on watercolor canvas or the modern Ampersand's Aquabord.
Tube watercolors are very nice to use. Keep them in a covered palette.
Spritz the colors you will be using with water to freshen the colors. If the paint is running low, put more paint into the well.
Watercolor brushes and a container of clean water are a necessity. Paper towels are also very handy.
Sketch or Draw Your Painting
Draw your composition on the painting surface.
If you erase while you are drawing, draw on a separate paper. Then transfer your drawing to the painting surface with graphite paper, so you won't damage the painting surface.
Use your photos or public domain photos for reference.
Select Your Colors
Three to five colors are a good choice. A harmonious painting uses a limited number of colors.
How to choose your color scheme for your paintings.
Let's Paint a Giraffe!
A Traditional Watercolor Giraffe Painting
Use these basic watercolor steps to create your own giraffe paintings.
Wet the Area You Will Be Painting
The colors to paint a giraffe are simply blue and orange, Ultramarine Blue and Burnt Sienna.
Let the water soak away slightly before you start painting. When the sheen is gone, start painting.
Apply the blue on the shadow side of the mother giraffe's neck.
As you come up the neck, add more water and fade out the blue.
Do the same on the baby.
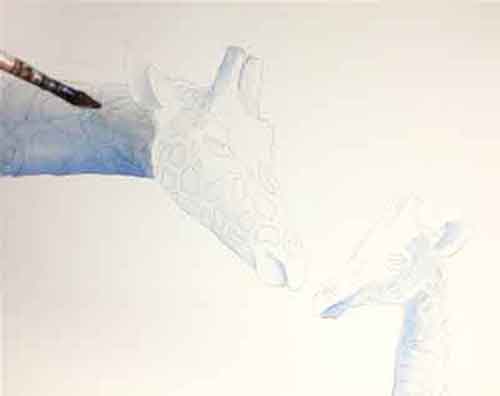 Wet the area you will be painting
Paint the Light Areas
Define your light source. In this painting the light comes from the upper right.
Form your subject by painting light and dark sides.
Use several light layers of color. Let one layer dry before glazing on the next layer.
Glaze a layer of Burnt Sienna over the blue shadow areas to create a lovely brown.
Paint only orange closer to the light. Notice the top of the mother's face was left white for a stronger highlight area.
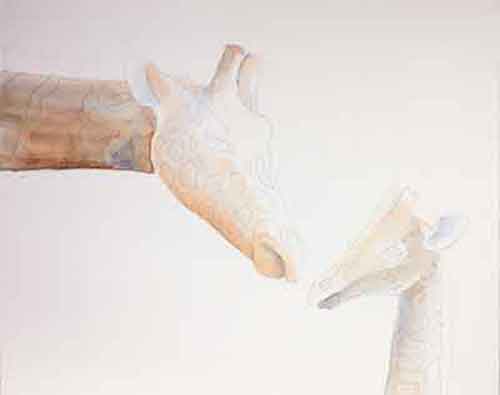 Paint the colors first
Paint the Darks
Paint the dark spots over the underpainting. The darker colors will cover the lighter colors.
Adjust the color intensity with more or less water.
The dark spots on the mother's neck are done with one layer of paint. Tube watercolors do not take several layers to get a dark color.
Premix blue and orange on your palette for the very dark brown of the eyes and other darks.
Paint both the mother and baby. Let them dry.
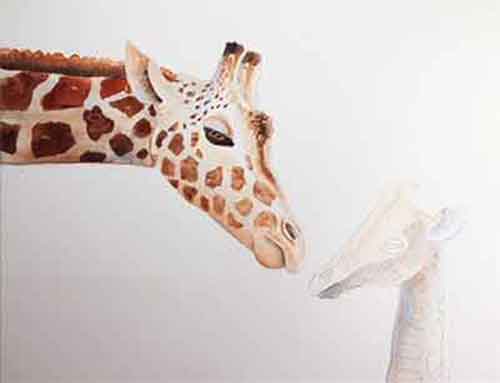 Paint the darks
Paint the Background
Before you paint, wet the painting area. Paint before the sheen goes away, so the paint will flow.
Use a large round brush and work quickly to prevent hard edges.
Flick some dark blue spots on for added interest. My idea was to repeat the pattern of giraffe spots.
You may paint a background without spots, which would be great.
How you paint a giraffe is your individual choice as the artist.
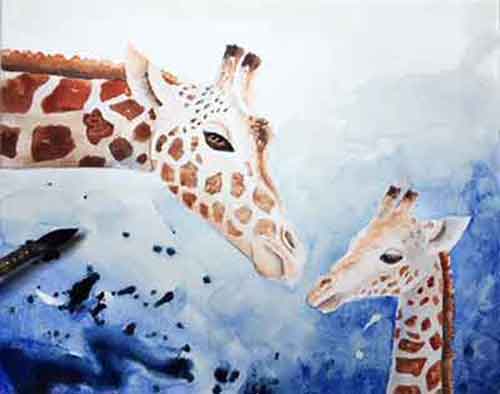 Paint the background
Please Note: Some people like to paint the background before the subject. If the subject is painted first, it is easier to see how to contrast the values.
When you paint a giraffe it's a matter of preference, either way is correct.
Detail and Finish the Painting
Look over your painting for any touches.
Check your values. Make sure you have used light and dark values to define the giraffes.
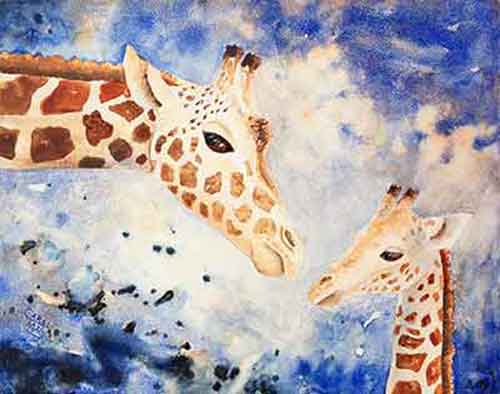 Detail and finish the painting
In the background I painted and flicked in some orange areas to help tie the subject and background together.
Later
I removed a bit of the orange in the background because it competed
with the giraffes. It's a matter of choice, put what looks good to you.
After the paint was dry, I scratched out the highlight on the mother's eye and touched it with a bit of orange.
A Colorful, Fun Giraffe Painting
Paint a giraffe with your own selection of colors. Choose 3-5 colors that suit your own taste!
This painting was done with New Gamboge, Opera Pink, Dioxazine Purple and Thalo Blue.
Draw Your Giraffe
Draw the giraffe on a separate paper. Transfer the drawing to your painting surface.
Draw directly on your painting surface if you are good at drawing.
Erasing on the painting surface may cause damage. A damaged surface may restrict the free flow of paint necessary for this technique.
This painting was done on an 11x14 Aquabord.
Use masking fluid and mask a highlight for each eye and let it dry.
See more about supplies for watercolor.
Wet your painting surface with a large brush.
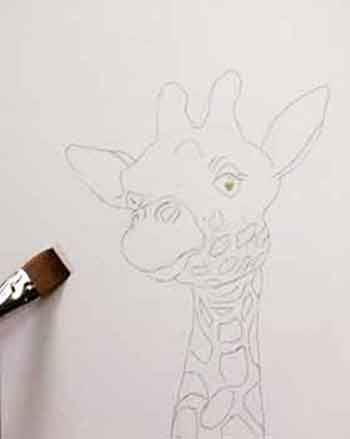 Put your drawing on the painting surface
Put Colors on the Wet Surface
Brush on 3-5 colors while the surface is still wet. On a large painting you may pour the watercolors. Pouring watercolor is fun!
The colors will flow and mingle together. See how the yellow and pink mixed to create orange.
Some of the purple flowed into green and made mud. I blotted the mud with a paper towel. And replaced it with some pink (See in the next image).
Spritz the outside edges of the colors, so they blend softly onto the white.
If you want some white around your colorful giraffe, leave dry areas and the paint won't flow there.
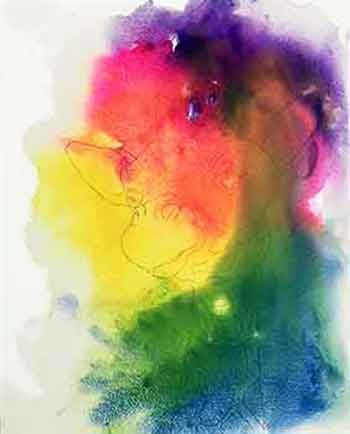 Put colors on the wet surface
Retrieve Your Drawing
Let the paint dry thoroughly. The colors dry a little lighter than the wet paint.
Lift the dried paint off the edges of the giraffe. The beauty of using Aquabord is that the colors will lift.
Lift the dry paint with a damp stiff brush, a fiberglass brush or the eraser on a #2 pencil. The pencil eraser is what I used for most of the lifting.
Make sure you can see the entire drawing by darkening the drawing with a #2 pencil.
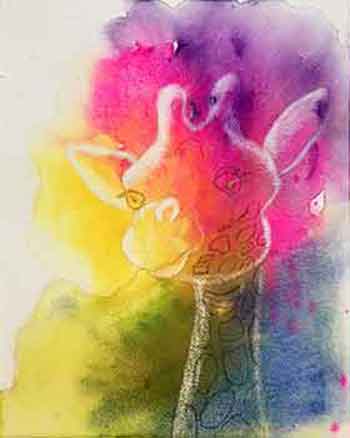 Retrieve your drawing
Paint the Darks and Highlights
Glaze more yellow for the light side of the giraffe and blue or purple for the shadow side. Look at the giraffe's neck for example, yellow on the left side and blue for the shadow side.
After the glazes are dry, paint the spots with purple.
Complete the rest of the painting in a similar manner, yellow for the lights and purple for the shadows.
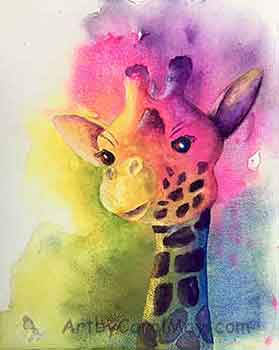 Paint the darks and highlights
Green was added to the left of the giraffe to pull it away from the background.
After the paint is dry remove the masking fluid to reveal the highlights in the eyes.
Lots of Fun - You Can Paint a Giraffe!
A Quick, Easy Giraffe Painting
Paint a giraffe to get a point across....
Paint the Main Subject
Paint a giraffe that is quick and easy on heavy #300 watercolor paper that does not require stretching.
Burnt Sienna and Ultramarine Blue are my favorite pair of paint mixing colors. They are great for mixing neutral, dark colors. Use more Sienna to make a warm brown and more Ultramarine for a cooler brown.
Use plenty of paint and paint on dry paper.
Use clean water to disperse and soften the color. Example, paint dark in the ear's shadow. Then quickly use water to pull the paint to the edge.
The giraffe's dark spots were painted quickly before the lighter underpainting was dry. Then the spots blend into the damp underpainting with soft edges.
Paint around the highlights in the eyes.
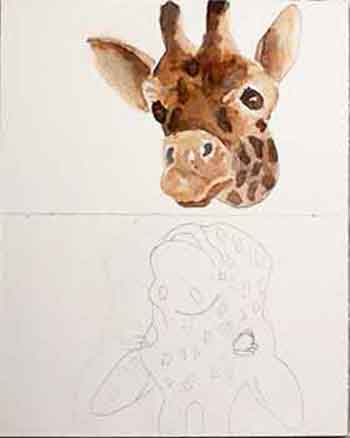 Paint the main subject
Paint the Reflected Giraffe
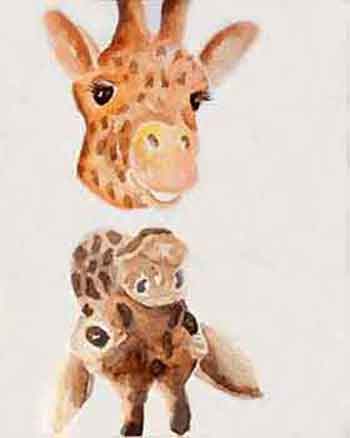
Turn the painting upside down and paint the second giraffe. I learned from previous paintings that I need to paint reflections right-side-up. My mind doesn't like painting upside-down.
This happy giraffe is done in brighter, cheerier colors. And it has a smile on its face.
Don't see yourself weighed down by the cares of the world. Instead see yourself beautiful the way God sees you.
 Paint the reflected giraffe
Paint the Background
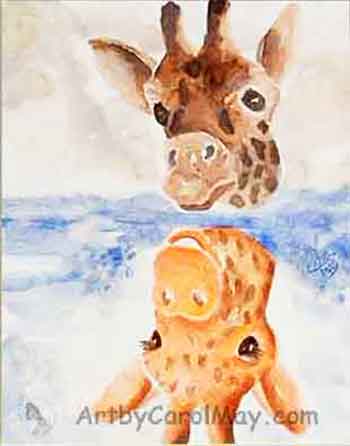
After the giraffes are painted and dry, paint the background.
There is blue water around the reflected giraffe and dirt around the unhappy giraffe.
When I do close-up subjects like these giraffes, I paint the background after the main subject. It gives me the opportunity to co-ordinate the colors and values against the main subject.
When I paint landscapes, I do the opposite. First I paint the background and then come forward and paint the focal point.
 Paint the background
Paint a Giraffe - Your Way!
There you have it, three different versions of how to paint a giraffe.
Use the basic watercolor techniques and create your own version of a giraffe.
- Wet your painting area.
- Paint the light areas first.
- Then paint the darks.
- Paint the background.
- Detail and finish the painting.


 Are you new and want to learn how to paint art? On this page, you’ll find ideas of what to paint, the supplies we really need, the fundamentals of good art (values, color, composition), and beginner-f…
 Are you eager to learn how to oil paint? What are the essential supplies for oil painting? What do we need for clean-up and how long do oil paintings take to dry? Learn the rules of oil painting and t…
 How do we create a focal point in art? Where do we put the focal point? How do we find the focus of an artwork? Should all paintings have a center of interest or can they have more than one? Learn fro…