- Home
- Watercolor Flowers
Painting Watercolor Flowers is Something Every Artist Needs to Know
Painting watercolor flowers is a challenge and that's what makes it exciting and fun!
Watercolors can be controlled to a certain extent, but there is always an element of surprise.
It is so much fun to let the watercolors do their thing. There is a wonderful suspense and anticipation, as the colors flow and create their own special beauty.
Paint the joy of springtime with three watercolor flower paintings, Echinacea, some Colorful Poppies and Bearded Iris.
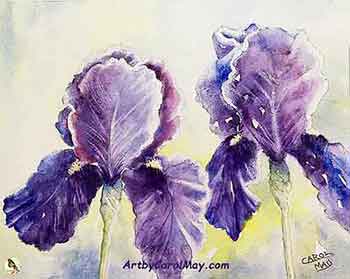 Painting Watercolor Bearded Iris
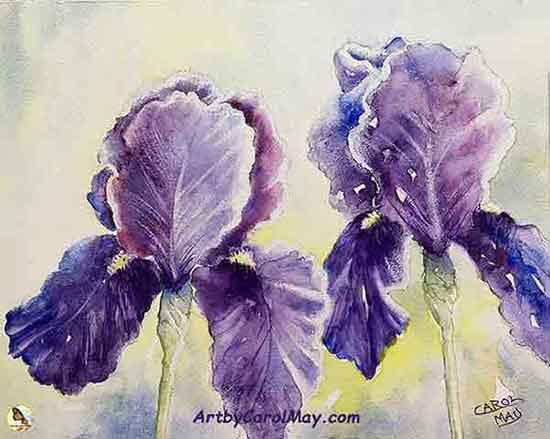 Painting Watercolor Bearded Iris
Painting Watercolor Flowers - Bearded Iris
Light, bright watercolor is perfect for depicting the beauty of flowers.
Draw and Transfer the Drawing
Draw your flowers on paper and transfer the drawing to your painting surface. Erasures may damage the painting surface.
This painting is done on my favorite watercolor surface, Aquabord.
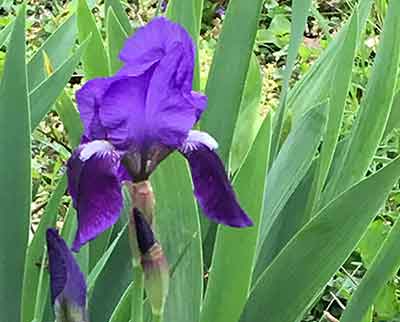 Bearded German Iris
Draw your flowers from life or good photos.
There are lots of Iris blooming in the springtime.
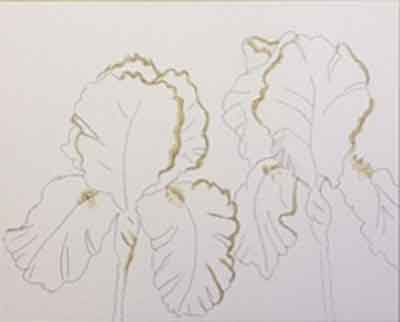 Mask the highlight areas.
Determine the direction of the light.
Apply masking fluid to preserve the highlights on the light side.
Paint the Flowers First
The painting color scheme for the Iris is compliment + 1/2 left. It is painted with blue, purple and yellow.
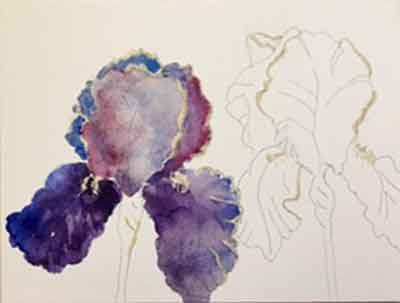 Under-paint the flowers
Use more water to paint lighter colors on the light side of the flowers.
A variation of colors makes a more interesting painting.
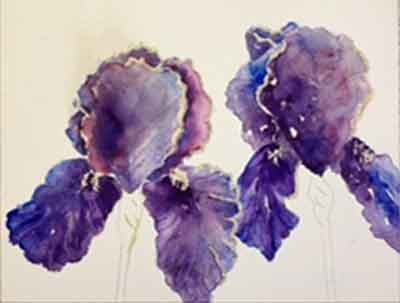 Darken the flower color where desired
Watercolor is often painted in layers.
When the first layer is dry, paint another layer to darken the desired areas.
Float in the Background
**When the flowers are dry, float in a light background of blue and yellow.
The complementary colors of yellow and purple make the purple flowers stand out against the yellow background. Contrasting colors is a part of painting watercolor flowers.
**After the background paint is thoroughly dry, remove the masking fluid.
Soften the edges of the highlight areas to make a
smooth transition from the highlights to the main color of the petals.
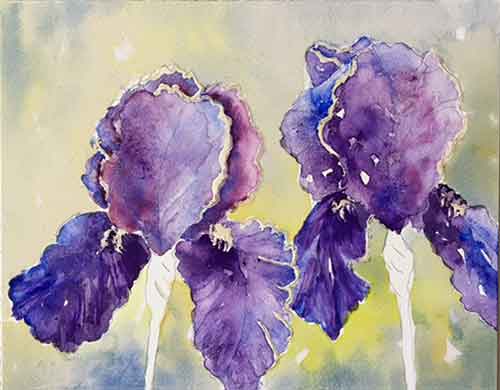 Float in a soft background
Detail and Finish the Painting
Paint in the stems with a combination of blue and yellow. Put a bit of yellow on the beards.
Lift out some highlighted veins with a damp brush or a fiberglass brush.
That is the beauty of Aquabord, the paint may be lifted off after it is dry.
The painting is complete.
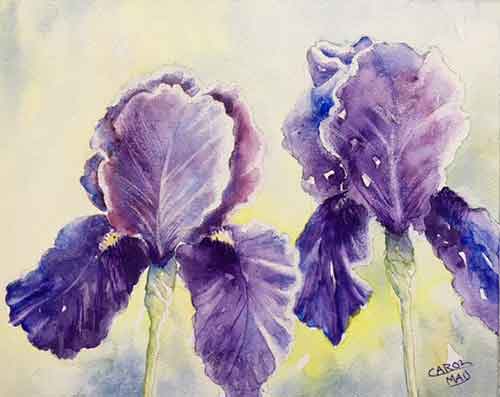 Finish the details
Try Your Hand at Watercolor Flowers. It's Easy!
Echinacea - Watercolor Flowers on Paper
Purple Coneflowers (Echinacea) are native in the Midwest. (They look pink to me, but they're called purple.) They bloom all summer and come back faithfully each spring.
Daisies have been my favorite flowers ever since I was a child. So I enjoyed painting one of my favorites. They are perfect for painting watercolor flowers.
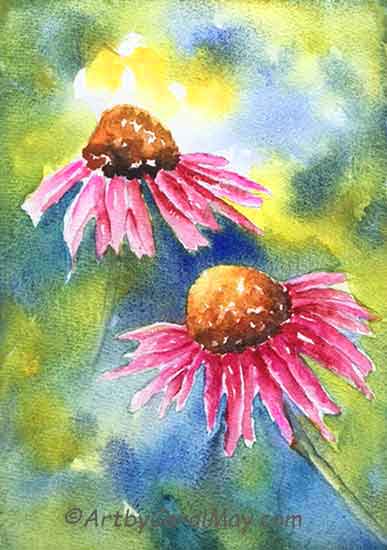 Echinacea on 300# paper
Draw and Transfer the Drawing
Notice neither of the flowers are centered and they each tilt a different direction. This helps give life to the painting.
I did a drawing in my sketchbook and transferred the drawing to the watercolor paper with graphite transfer paper.
Erasures can damage watercolor paper, so I did all my erasing in the sketch book.
Check here for more tips on easy compositions.
Select Your Colors and Painting Surface
Normally my watercolors go on Aquabord, but this time I used a block of 300# watercolor paper for a fun, quick painting.
300# watercolor paper does not warp and buckle like lighter weight papers.
The color scheme is a semi-triad of red (lightened to make pink), yellow and blue. I slipped a bit of orange on the center cones. The yellow and blue are mixed for the greens.
Normally I paint with a limited number of colors. It simplifies the painting process and makes it more restful for the viewer.
When you are painting watercolor flowers learn how to select your color scheme.
This was a quick, fun painting, so no masking was done before painting.
Painting the Flowers
Relax while painting watercolor flowers. The painting will go smoothly and you will have more fun.
**Paint the pink petals first. Wet the petal and start painting at the base of the center cone. Pull the color out to the end of the petal. The paint gets lighter, as you go out toward the tip of the petals.
**Leave some edges of the petal highlighted to give some separation between the petals.
Yellow goes on the top of the cone which is closest to the light source. Add blue to the bottom for the shadow side of the cone.
**Let the flower paint dry.
Paint the Background
After the flowers are thoroughly dry, wet the entire background.
Float in variations of yellow and blue and a mixture of green. Keep the colors lighter toward the light source and darker at the bottom of the painting.
**Use a second wash of blue between the two flowers to highlight the focal flower.
Painting watercolor flowers is fun! - How about painting watercolor Daylilies.
Colorful Poppies - Painted with Watercolor
The idea for this painting came from an oil painting by Nancy Medina. The painting is changed significantly from the original, but I want to give Nancy credit for the idea.
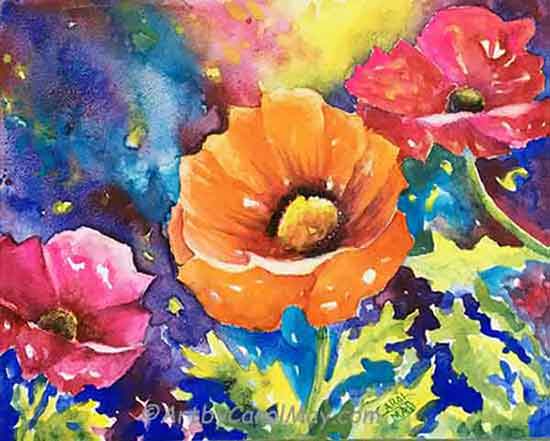 Colorful Poppies
This was a carefree painting in my favorite free painting style. Don't try to produce a photocopy. Painting watercolor flowers is such a joy with its unpredictable results.
Just have fun painting!
Draw and Transfer the Drawing
The painting was drawn in my sketchbook and transferred to an 8x10 inch Aquabord with graphite transfer paper.
The dried painting was sprayed with Krylon UV spray and framed without glass. Aquabord is my favorite surface for painting watercolor flowers and for that matter all of my watercolor paintings.
Watercolor paintings on Aquabord don't have to matted or framed under glass. They are so much easier to frame and display.
**No masking was used. Paint around the white areas.
Colors
This painting is done with an analogous color scheme of yellow, pink and orange with their compliments of blue and purple.
This painting breaks the rules of good composition because the focal flower is dead center in the painting.
But painting watercolor flowers is so much fun - just let it flow!
Painting the Flowers
The main subject, the flowers were painted first.
**While painting, leave specks of unpainted areas to give spark and light to the painting.
Paint the Background Around the Flowers
When the flowers were dry, I floated in dark colors for the background. This is my normal painting process for portraits of close-up subjects. Paint the main subject first and then paint the background around the main subject.
**When the main subject is painted first, it gives you a better idea of what value to paint the background. The dark background really sets off the light colored flowers.
Where Is the Light Source?
The yellow by the right-hand flower indicates the light source.
**It is a good idea to repeat colors throughout the painting. This gives the painting cohesiveness.
Drop yellow into the white spots that were left while painting the background. And spatter some yellow into the wet background.
**Carefully
paint the background around the leaf areas.
Then the stems and leaves can be painted in a carefree manner with yellow and a mixed green. How to mix different green colors.
What a Delightful Painting!
Are You Ready to Start Painting Watercolor Flowers?
It's easy, just follow these simple steps:
- Select, draw and transfer your subject to your painting surface.
- Choose your colors.
- Mask the highlight areas you want to preserve. Let the masking fluid dry.
- Paint the main subject.
- Paint the background with values to highlight the main subject.
- Complete the painting with any finishing touches you like.
Have fun painting - That's what it's about!


 How do we create a focal point in art? Where do we put the focal point? How do we find the focus of an artwork? Should all paintings have a center of interest or can they have more than one? Learn fro…
 Art elements and principles appear over and over in good paintings. The elements and principles work together for us to create successful artwork. Art principles are the rules that govern how an artis…
 Artists often use the meaning of color to convey emotions, sentiments, and symbolism. Are you intrigued by the idea that colors can enhance or suppress different aspects of your paintings? Let's look…