- Home
- Paint a Dog
How to Paint a Dog: An Easy Canvas Painting
We all love our pets! Would you like to know how to paint a dog?
This step-by-step tutorial will take you through seven easy steps to paint a perky little dog on canvas. Painting on canvas is easy, even for beginners.
The painting uses only three colors with the basic techniques of oil painting.
An acrylic artist may easily use the same steps to do the painting.
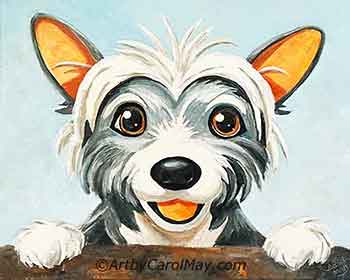 Painting is fun!
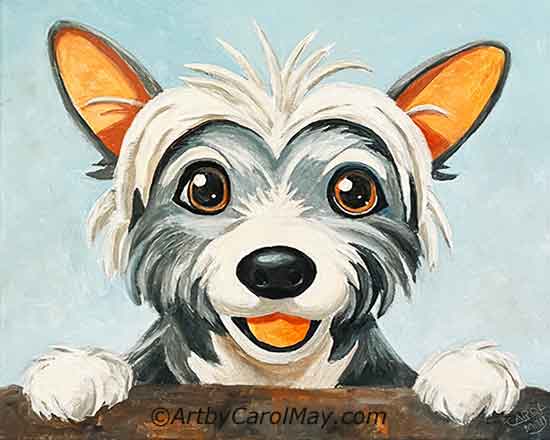 Painting is fun!
Easy Canvas Painting for Beginners
This dog painting uses a canvas that has been stretched around wooden stretcher bars. There are two types of stretched canvases.
A traditional canvas is stapled to the sides of the wood bars.
When the canvas is stapled on the sides of the stretcher bars, the finished painting will need a frame to cover the staples.
A gallery-wrap canvas has the canvas stapled on the back of the wood bars. We can paint the canvas over the side of the bars. Then the finished painting may be displayed without a frame. It's a modern look for today's paintings.
How to Prepare the Canvas
Painting on
canvas is easy.
NO preparation is needed! The commercial art canvases are ready for painting. They
have already been prepared with coats of gesso.
They are easy to paint on because the gesso prevents the paint from sinking into the canvas.
This painting was done on a triple-primed 11x14 inch gallery-wrap canvas. But you certainly may do the painting larger or smaller, as you learn how to paint a dog. Oil painting supplies are found here.
Start Your Dog Painting with a Drawing
Lightly draw the dog on the canvas with an ordinary pencil.
People good at drawing can just sketch the drawing onto the canvas. I used the grid method. You may see some of my grid lines in the next photo.
Alternately you may trace the image off of the computer screen and then transfer it to the canvas with graphite paper.
What brushes?
Traditionally oil painting is done with Hog Hair brushes. Today there are synthetic brushes that work just as well. The brush should be stiff enough to move the oil paint.
This painting was done with a #4 flat brush. A #2 round was used for the eyes and nose.
Use the brush flat to cover larger areas. Turn it on edge to paint thinner areas.
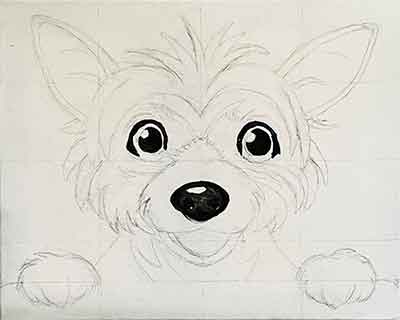 Paint the darks on the eyes and nose.
Use a little odorless mineral spirits to thin the paint. Use just enough to make it flow; you want the paint to remain black.
Paint the black of the eyes and nose. Leave the shiny highlights unpainted.
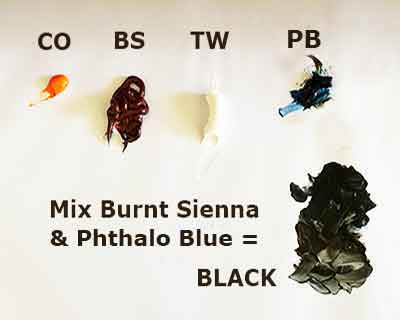 Paint a dog with 3 colors and white.
This painting uses 3 oil colors: Cadmium Orange, Burnt Sienna and Phthalo Blue, plus Titanium White.
Mix Burnt Sienna with a little Phthalo Blue (phthalocyanine blue) to make a black.
Instead of Phthalo Blue, you may use Prussian Blue. It's a good all-around blue. Ultramarine Blue also works well with Burnt Sienna for mixing black.
Burnt Sienna and Ultramarine Blue are my most used colors. Almost always, I use one or the other or both in painting a landscape, and of course animal paintings.
How to Use Oil Paint
Oil paintings are painted dark to light and thin to thick. Some people say, fat over lean, that's the same as thin to thick.
- We start the painting with thin dark colors, leaving the light places unpainted.
- As the painting progresses, we paint thicker and lighter.
- The final layer and touch-ups are done with thick paint.
Go here to get more details on how to do an oil painting.
#1 How to Paint a Dog
Paint the dark colors. The eyes and nose are actually part of this step, but I didn't to take a photo of the drawing before I started painting.
You have already mixed the black paint, now add just a little white to make a dark grey.
Refer to the finished painting to locate the darkest grey areas.
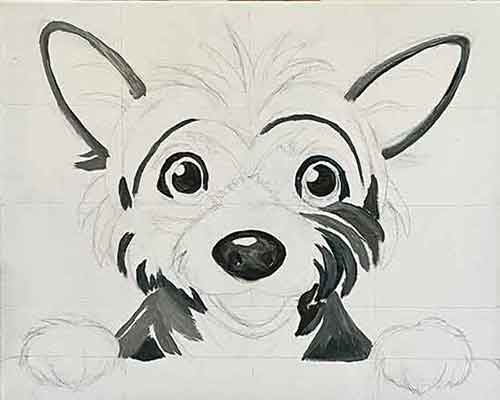 Paint the shadowed areas of the fur.
#2 Paint the Ears and Tongue
Burnt Sienna is a dark earthy orange. Depending on the brand of paint you use, you may need to tone the Burnt Sienna down with some blue.
Use Cadmium Orange to spark up the mix for the dog's tongue,
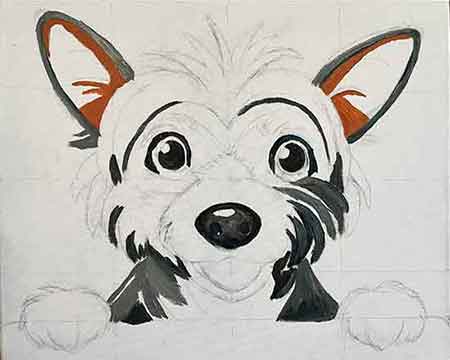 Paint the shadows inside the ears.
Use Burnt Sienna to paint the shadow areas inside the ears. If the color is too orange, dull it with a "tiny touch" of blue.
Paint the shadows of the hair sprigs. Leave the white sprigs unpainted until step 6.
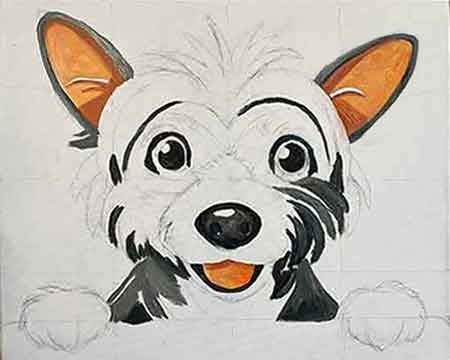 Paint orange in the ears and on the tongue.
Add Cadmium Orange and white to the shadow mixture. Finish inside the ears. Paint around the sprigs of hair.
Add more orange to the mixture and paint the tongue.
#3 How to Paint the Dog Fur
The light is from the left, so there are more dark colors in the grey fur on the right-hand side of the painting.
Notice the right shoulder is mostly dark grey because it is in shadow. The fur shadows on the right cheek are darker than the shadows on the left cheek.
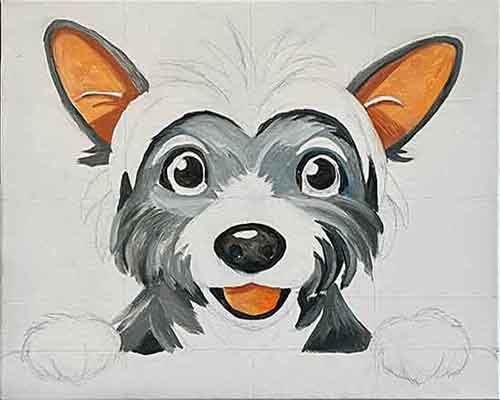 Paint the greys on the dog's fur.
#4 Paint the Background
The background color is a light blue. Mix a little blue with a pile of white, add a touch of orange to neutralize the blue. Get more top tips on how to mix colors.
Cover the background with one coat of paint, so only thin the paint if necessary.
Paint around the dog. You may texture the background some with the brush strokes. In this painting the strokes are smoothed down, so they wouldn't compete with the dog's face.
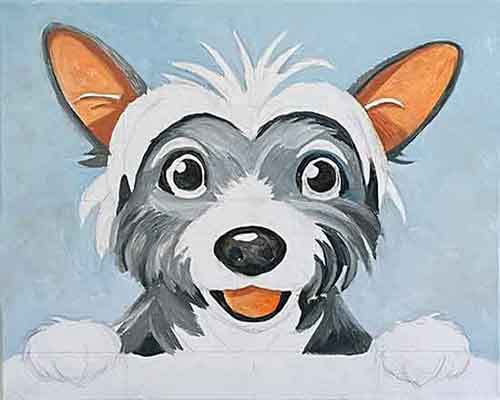 Paint the background around the dog.
#5 Painting the Dog's Eyes
The eyes are a large part of how to paint a dog.
The black pupils of the dog's eyes were painted in step #1. Now paint black under and around the inside of the eyelids.
Paint brown around the black pupil of the eyes. Mix a speck of blue with the sienna to make brown. Do not add any white. Thin the paint a bit, so it's easy to paint on with your smallest brush.
Leave some white areas around the colored part of the eyes.
Finish painting the nose with a grey highlight blended smoothly into the black. Darken the nostrils if they need it.
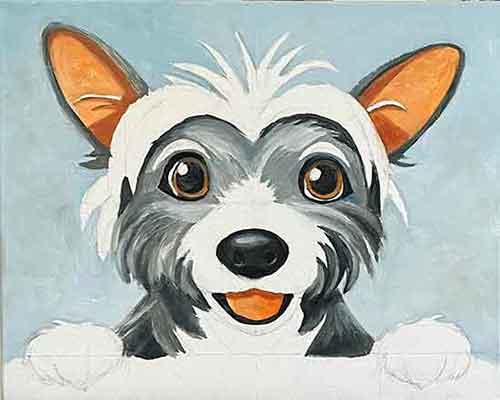 Notice how the eyes warm up the painting.
#6 Shadow the White Fur
Paint the shadows on the white parts of the fur; the top of the head, under the nose, around the muzzle, the front of the chest and the paws.
Mix blue, sienna and white for the light brown. The shadows on the paws are greyer with more blue.
It looks funny now, but in the next step the shadows will blend into the highlight color and look more natural.
Do the next step before the shadow colors dry.
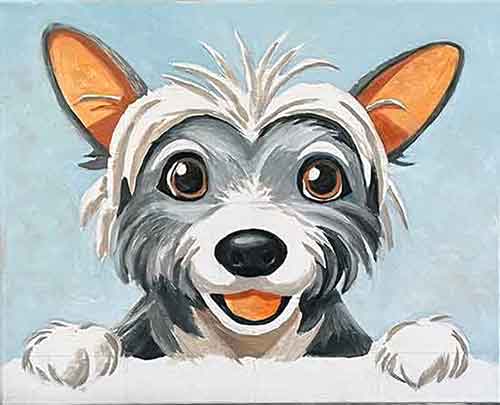 Shadow the white fur on the head and paws.
#7 The Finish and Details
Paint all the white fur with straight paint, no thinner.
Mix a tiny bit of orange or Burnt Sienna into white to warm it. White out of the tube is a cool color and we want warm highlights.
While painting the white around the shadows, blend it into the edge of the shadow colors. Even cover-up some of the shadows where needed.
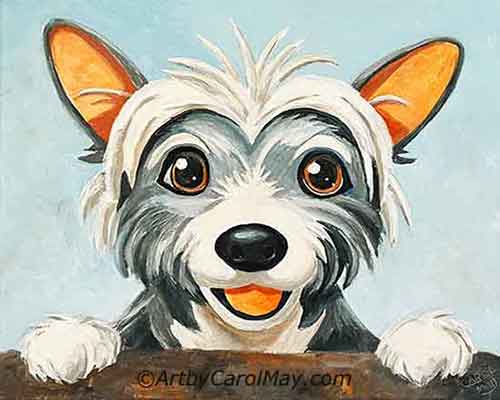 Paint and blend the highlights into the shadows.
Add a couple of tiny specks of warm white on the eyes.
Use the paint from your palette, browns, greys, and sienna to simulate a wood fence. We don't put details in the fence that would draw the attention away from the dog.
There you have it - an easy painting of a dog!
recap: how to paint on canvas
Store-bought canvas is ready to paint. It easy, no preparation is needed!
We only need a couple of brushes and three colors.
how to paint a dog
Paint the dark colors first. Then paint lighter and thicker to the finish.
Use thinned paint in the first layer, then use less thinner as you paint and preferably none in the last layer.


 How do we create a focal point in art? Where do we put the focal point? How do we find the focus of an artwork? Should all paintings have a center of interest or can they have more than one? Learn fro…
 Art elements and principles appear over and over in good paintings. The elements and principles work together for us to create successful artwork. Art principles are the rules that govern how an artis…
 Artists often use the meaning of color to convey emotions, sentiments, and symbolism. Are you intrigued by the idea that colors can enhance or suppress different aspects of your paintings? Let's look…