- Home
- Paint a Landscape
How to Paint a Landscape from Start to Finish
Every artist needs to know how to paint a landscape.
We create appealing landscape paintings with aerial perspective, colors, values, texture and detail.
God has gifted us with so many gorgeous landscapes! This painting is a mountain lake, flanked by evergreen trees.
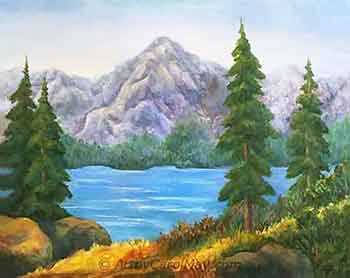 Painting a "Mountain Lake"
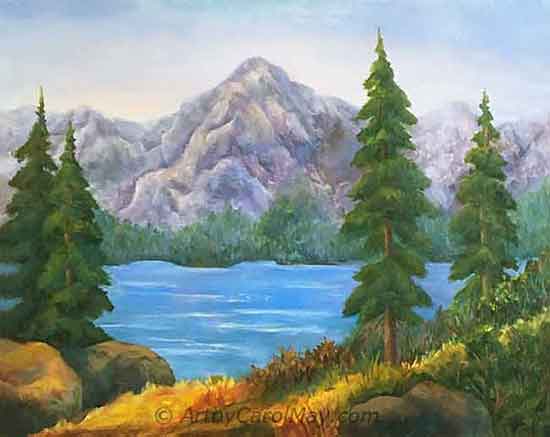 Painting a "Mountain Lake"
The best way to paint a landscape with oils is to start with the background first.
Then paint forward to the middle-ground. Paint layer upon layer and down to the foreground. Do the details and finish last.
- The Basics of How to Paint a Landscape
- Painting a Landscape Background
- Next Paint the Middle-ground
- Painting the Foreground
- Detail and Finish
The Basics of How to Paint a Landscape
Here are some general concepts for painting landscapes. They work the same for any type of medium, watercolor, oils, pastel or whatever you enjoy using.
How Do We Start Painting a Landscape?
It is not a hard and fast rule, but normally landscapes are painted from the background to the foreground. This is because the items in the foreground overlap the things in the background.
Paint the distance first. Then paint closer and closer down to the bottom of the painting. It doesn't have to be done this way, but it seems easier.
Creating a Landscape Composition
- Provide a way for the viewer to enter the painting. The viewer would normally enter the painting from the bottom. We read from left to right, so the logical place for the viewer to enter is the bottom left.
- Keep the viewer's eyes inside the painting. Don't paint lines leading directly out of the painting. This especially applies to a long, straight horizon line without any stops or a line going out the corner.
- Give the viewer plenty to see. Use a variety of colors, values and shapes. This is how to paint a landscape that is more interesting.
This Composition
There are so many different ways to compose a painting. Let's look at the painting and see how to paint a landscape with a circular composition.
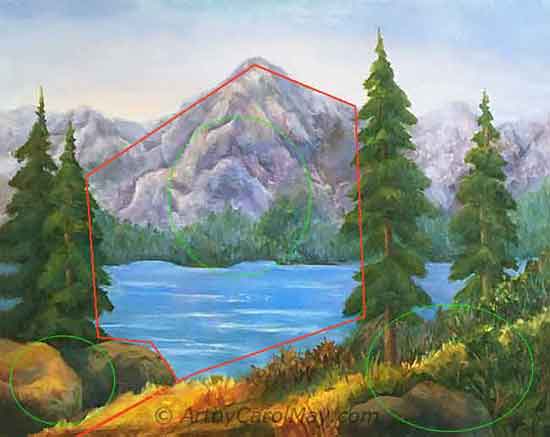 The viewer's eyes will follow the composition lines.
The red line is the main composition.
- The viewer enters the painting at the lower left.
- Their eyes would follow the grass-line to the large evergreen tree.
- They follow the tree up and move to the mountain top.
- The edge of the mountain goes down to the two left trees.
- Moving down over the rocks completes the circle.
Green circles mark interesting items that keep the viewers looking.
- The foreground grass, rocks and foliage
- The shore-line trees in the distance
- A glowing sky
- Evergreen trees
- The lake - The highlights might possibly lead the viewer on a shortcut across the water and up to the mountain.
Materials for This Landscape Painting
- Use your favorite oil or alkyd paints. Oil Painting Supplies
- The painting is 16x20.
- Various sized flat brushes were used. Brights or filberts work fine.
- A limited number of colors: Cadmium Yellow, Burnt Sienna, Cadmium Red Light, Alizarin Crimson, Thalo Blue and white.
Landscape Painting References
If you are not painting on site, it is good to have some reference photos.
This mountain lake painting was done out of my head. It would have been a good idea to have some reference photos for the mountain and trees.
Work out your composition on paper first. You don't have to use my composition. You are the artist, you can move trees around, change the mountain, the water, adjust the colors, etc.
- Pencil or paint a line drawing onto the painting surface.
Oil
paint will cover right over light pencil marks or paint that has been
thinned with solvent. Thinned yellow paint is good because other colors can easily cover yellow paint.
Make it your painting - that's the joy of painting.
How to Paint a Landscape Background
We will start painting from the back of the landscape toward the front.
Block-in the Mountains
The best way to paint a landscape is to block-in the colors on the entire canvas.
This step was by-passed and regretted later. There was so much white canvas showing that it was hard to judge the correct value of the water.
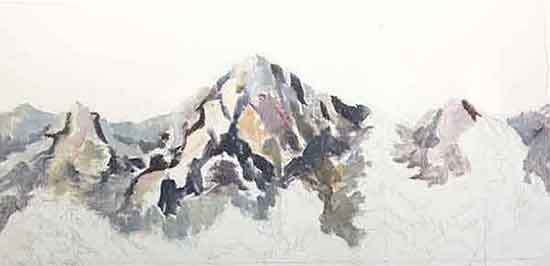 Block-in the mountain values.
Block-in the main values of the mountains. Thin the paint with some solvent, so it will dry quickly.
Spot out the dark parts of the mountain. Thalo Blue and Burnt Sienna make a nice dark. Mix a little white with the dark to make the lighter greys.
- The sunlight is coming from the left. Use warmer colors (mixtures of yellow, sienna and the reds) on the sunny parts of the mountains.
Thalo Blue and either of the reds, plus white makes some lovely violets. If the violets seem too strong, tone them down with their compliment, yellow. More tips on mixing colors.
Paint the Mountains
Aerial perspective makes colors cooler and edges softer in the distance. This is caused by water and dust particles in the air.
Paint the mountains with an overall bluish or violet appearance and soft edges.
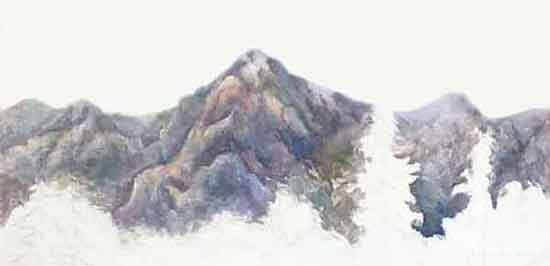 Finish painting the mountains.
- Mix some warm colors and dark colors with little or no solvent.
When we are learning how to paint a landscape, keep in mind that bluish or violet tones will recede. The light, warmer tones will advance.
Where one color meets another color, gently blend them together to create soft edges. The mountains are too far away to see hard edges.
- Don't blend away all the dark colors. Keep the dark values in the crevices. Some of the thin blocked-in colors will remain untouched in the crevices.
Paint the Sky
The best way of painting a landscape is to select a focal point and down-play the other areas of the painting. We don't want them to compete with the focal point.
The focal point of this painting is the water and mountains. How do we create a focal point?
We could have put a bunch of clouds in the sky, but that would be a distraction. A simple sky shows off the mountains with all their detail.
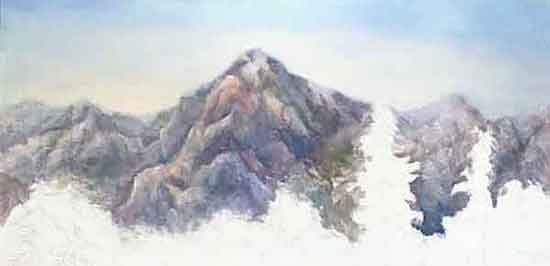 Paint the sky.
The Top of the Sky
Paint the sky darker at the top and lighter toward the horizon.
Mix a little bit of blue with white for the blue sky. Adding a touch of Burnt Sienna will make a more natural looking blue.
Start painting at the top of the canvas. Paint down toward the mountains using less blue and whiter close to the mountains.
- Use criss-cross brush stokes to blend and smooth the blue sky. There can be color variations in the sky, but no hard edges.
The Bottom of the Sky
Mix a very light orange-white color using yellow, Cadmium Red Light with white.
Start painting this mixture at the top of the mountains and paint up toward the top of the canvas. Leave blue at the top. Softly blend the white and blue together.
- Wipe the paint off the brush with a rag or paper towel. Then, gently pull the dry brush along the edge of the mountains where they meet the sky. This creates a soft edge and pushes the mountains into the distance.
Do not wash the brush in solvent before softening the edge. Any solvent remaining in the brush will pull paint off, instead of softening the edges.
Next Paint the Middle-ground
Coming forward, we paint the center items before the foreground and details.
Paint the Water
Paint horizontally and cover the water area with a mixture of Thalo Blue, Burnt Sienna and white. Only use enough solvent or medium to make the paint flow.
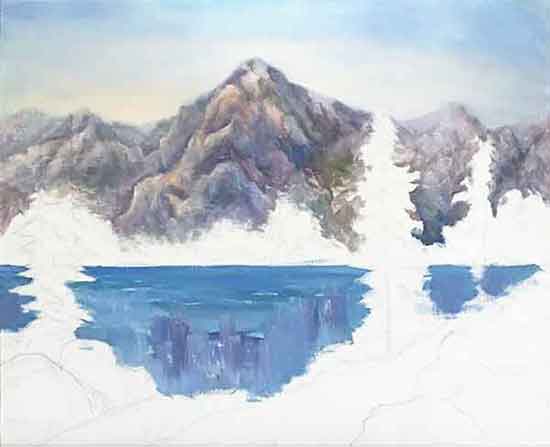 Paint the mountain lake.
Add more white in the forward water area.
Next, add color variations on top of the blue. Stroke the variations down over the blue. Violet or green would be a nice choice. Wipe the brush clean and then stroke horizontally to merge the colors.
You may want to put some horizontal water lines, but we will highlight the water in the final steps.
Paint the Distant Trees
The distance in a landscape is always lighter and bluer than the foreground. So, we paint the distant trees, bluer and lighter than the foreground trees.
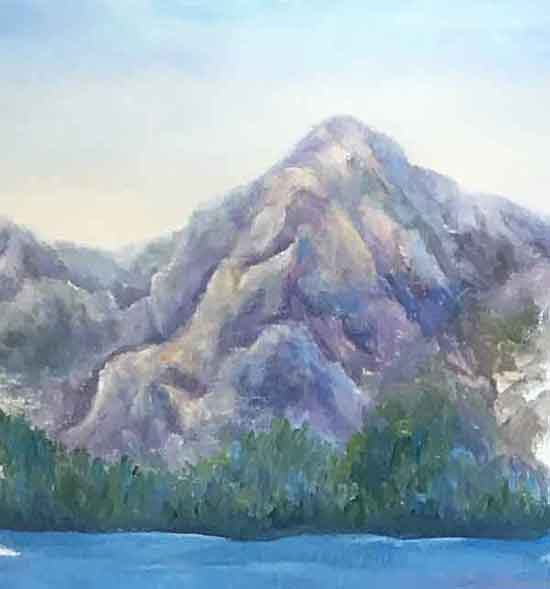 The distant trees are lighter in value and color.
Mix blue and yellow for a green. Then mute the green with either Cadmium Red Light or Burnt Sienna. Mix a variety of greens and bluish greens. Lighten the greens with white.
Using a small flat brush held vertically to paint the distant trees. Create more interest by varying the colors and the strokes.
Notice that the trees don't grow right to the edge of the water. There will be some dark areas on the water's edge.
An undulating waterline gives more interest than a long straight line.
Painting the Foreground
Distance is an important item of painting landscapes. We create distance in our paintings by having items overlap what is painted behind them.
Block-in the Foreground
Block-in the general colors of each item in the foreground.
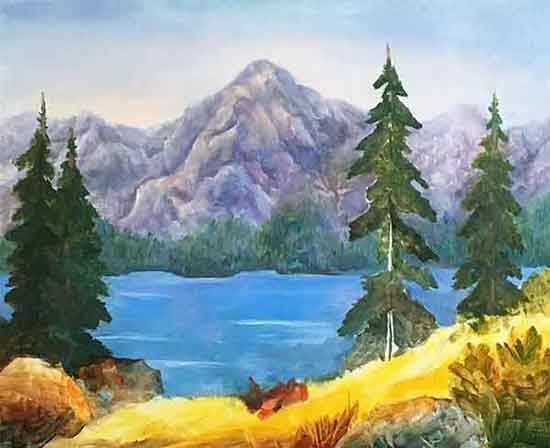 Block-in the colors of the foreground.
It is best to block-in the entire composition first before painting. It was a mistake to not have the block-in done before painting the water.
The white canvas around the water made it hard to judge the values. After blocking in the rest of the colors, it was easy to judge the values.
Paint the Evergreen Trees
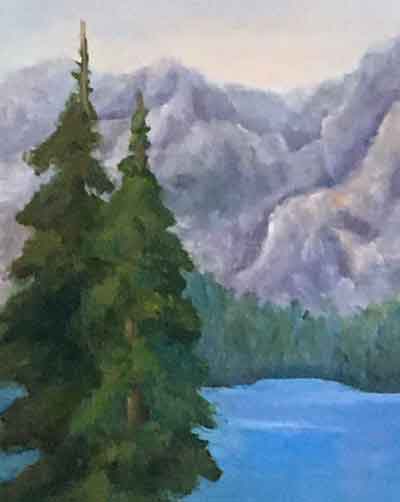 Paint one tree in front of the other.
Mix a variation of greens for the evergreen trees.
Set one object behind another by changing the values between the two objects.
You may either paint the back tree lighter or darker, it's your choice. Just make each tree a different value to separate them.
You may want to paint some areas of exposed tree trunk. Use Burnt Sienna with blue and a bit of white for the trunks.
The tree boughs will be lighter on top and darker underneath. The light is coming from the left.
Soften and lighten the tip-top of the trees, so they don't lead the eye out of the painting.
Paint the Rocks
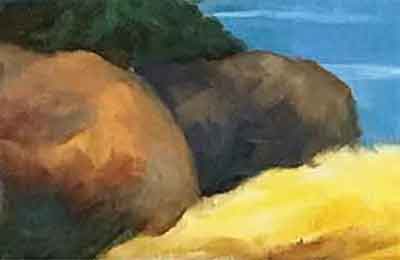 Paint the foreground rocks.
Paint each rock a different value to separate them.
Mix a variety of browns or greys (your choice of colors) with the blue and Burnt Sienna.
Paint dark on the bottom of the rocks. Add lighter colors and highlights toward their tops.
Leave the paint stokes without blending. This indicates the hardness and texture of the rocks.
Painting the Bushes
Start painting the bushes behind the forward slope. Don't paint every leaf and stem. Paint for a general impression.
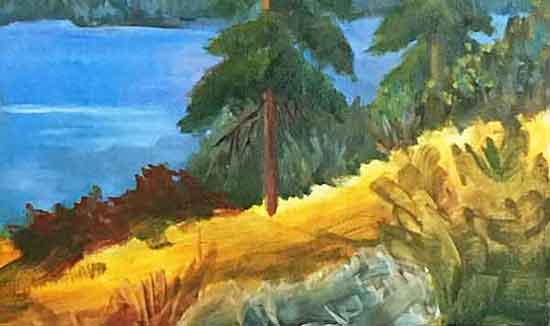 Start painting the foreground foliage.
When we are painting a landscape, remember to feature a focal point or focal area. The lake and the mountain are the main focus of this painting.
A lot of detail in other areas of the painting will pull the eye away from the focal point. This is especially true of areas near the sides and bottom of the canvas.
That's why we are not going for a lot of detail in the foreground. We just want a general impression of the rocks and foliage.
We still want to give the viewer plenty to see with a variety of values and colors.
Paint some foliage in front of the far right tree to set it back. Add a few lighter colors for interest.
Use cool colors behind the trunk of the main tree. The trunk is warm colored. It will stand out against the cool colors. Maybe there are some dead branches on the bottom of the tree.
Detail and Finish Your Landscape Painting
Add details and highlights throughout the painting where needed.
Complete the Foreground
Paint the close-up grass, foliage and rock. Concentrate on variety.
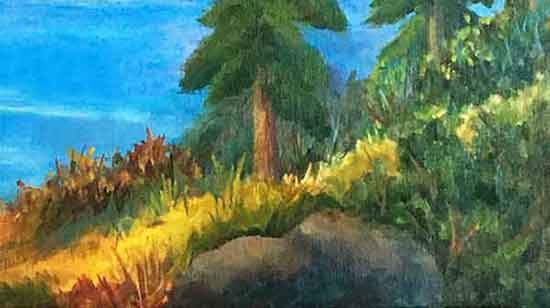 Complete the foreground details.
This is a natural landscape and nothing would be perfect. Paint here and there, leaving parts of the underpainting showing.
Place the bottom right foliage and rock in shadow. This helps to keep the eyes inside the canvas.
Place a few stems or small branches in the bottom, right foliage. They are not obvious, but they give the viewer more to see when they are looking closely.
Highlight the left side of the main tree trunk and make sure the right side is darker.
Highlight the Water
Highlights on the water will move the viewer's eye up into the painting.
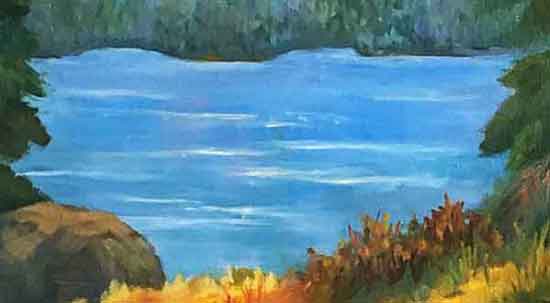 Paint highlights on the water.
Mix a soft, greyed blue and paint some horizontal highlights.
Then mix a warm white using a bit of orange or yellow. Place a few of the warm highlights on the water.
Wipe the paint off of the brush, don't use solvent. Then soften the highlights, as desired.
Look around the painting to see if any other adjustments are needed.
There you have it, lots of tips on how to paint a landscape.


 How do we create a focal point in art? Where do we put the focal point? How do we find the focus of an artwork? Should all paintings have a center of interest or can they have more than one? Learn fro…
 Art elements and principles appear over and over in good paintings. The elements and principles work together for us to create successful artwork. Art principles are the rules that govern how an artis…
 Artists often use the meaning of color to convey emotions, sentiments, and symbolism. Are you intrigued by the idea that colors can enhance or suppress different aspects of your paintings? Let's look…