- Home
- Paint a Horse
Do You Want to Know How to Paint a Horse?
How to paint a horse: An easy watercolor tutorial of a white prancing horse on a mixture of vibrant, dark colors that frame the horse.
When we paint
the background colors, we let them run together and do their own thing.
That's the joy of painting with watercolors!
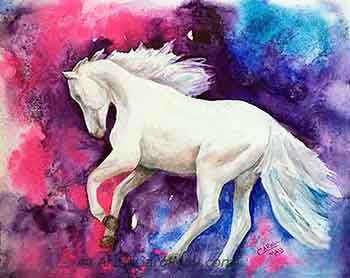 He loves his watercolor background.
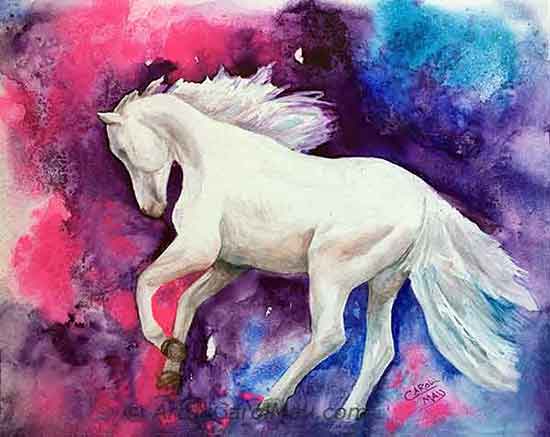 He loves his watercolor background.
What Do We Need to Paint a Horse?
The materials used for this horse painting:
- An 11"x14" watercolor aquabord. This painting will also, work very well on a larger format.
- Round watercolor brushes #5 and #7, plus a 1/2" stiffer angle brush for removing paint. If you paint larger, use larger brushes.
- Tube watercolors are best for this painting style: a warm and cool blue, purple, pink and Burnt Sienna.
- Spray the finished Aquabord painting with Krylon UV Resistant Spray.
- You can look at watercolor supplies here.
How to Paint a Horse Step by Step
Get a good reference photo and draw your horse. This painting was done from a photo by Karen Broemmelsick.
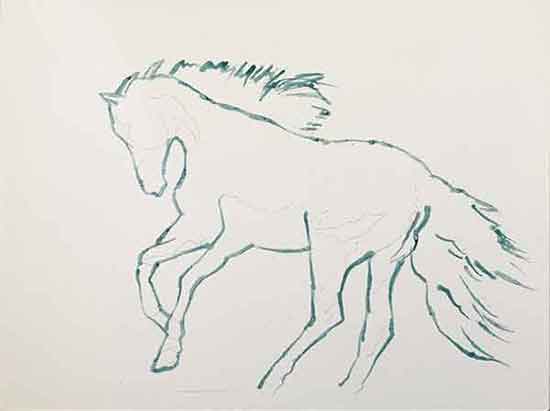 Draw the horse and apply masking.
It's best to do your drawing on a separate page and then transfer it to your painting surface. Too many erasures on the painting surface can damage it.
We are going to paint the background first, so apply a masking fluid around the edges of the horse.
Let the masking fluid dry thoroughly before starting on the background, approximately an hour.
Paint the Background
Choose your desired background colors.
You don't have to use my selection.
Let your mind run free and enjoy the pleasure of painting with watercolor.
Since this horse will be light colored, a dark background makes a nice contrast. Use darker colors where you want more contrast. The colors are darker around the horse's head and back.
Don't try to copy the background in this painting. This is the fun part of how to paint a horse.
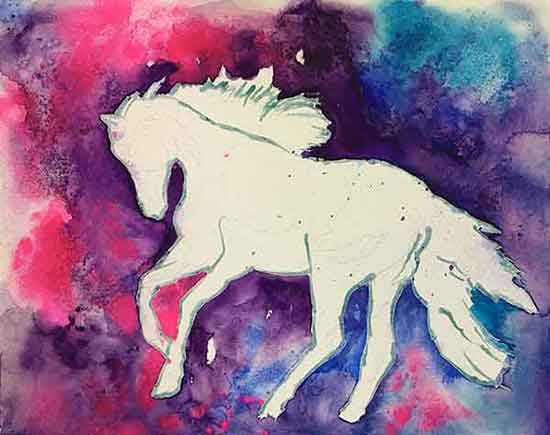 Paint the background around the horse.
Let's Play and Have Fun!
Dampen the background with a clean brush of water. The water soaks in fairly fast. So dampen each area before you paint it.
Tube watercolors work well for this technique because they can be mixed with less water. Less water means we get intense colors.
Sometimes the colors are painted on. Other times they are splattered on. An occasional spritz of water will help soften and blend the colors.
Work fast, so the colors will blend together.
A separate brush for each color works well, so you don't have to keep washing the brush. The colors stay clean and it speeds up the painting process.
After the colors are on and starting to dry, spend some time softening hard edges or back-runs. If desired, you may use some salt for added texture.
There is no right or wrong on this part of the painting, just keep it dark and have fun.
Let the background dry. For a background like this, overnight is good. A hair dryer will speed up the process, but it can move the paint around and make the masking fluid difficult to remove.
You may also pour the background, especially on larger formats.
Remove Masking and Soften Edges
Make sure the background is completely dry. Remove the masking all around the outside edge of the horse. Some masking on the interior areas of the horse is left on for highlights.
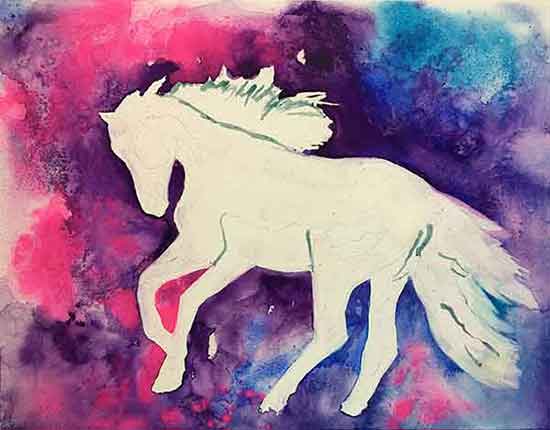 The background is finished.
Rub the masking fluid off with a rubber cement pick-up eraser or a dry finger. The paint must be completely dry or you will get a mess.
If you used salt, brush it off with a dry hand.
Use a damp brush and soften the edge between the horse and the background.
Use a clean, damp stiff brush to remove any spatters from the horse and redefine the drawing. This one advantage of Aquabord, you can remove paint.
Start softening the edge of the tail. When we paint a horse, we don't want high contrast between the tail and its background. Contrast on the back end would draw attention away from the front of the horse.
More reasons why I enjoy using Aquabord.
How to Paint a Horse
We will paint the horse a little more carefully than the background.
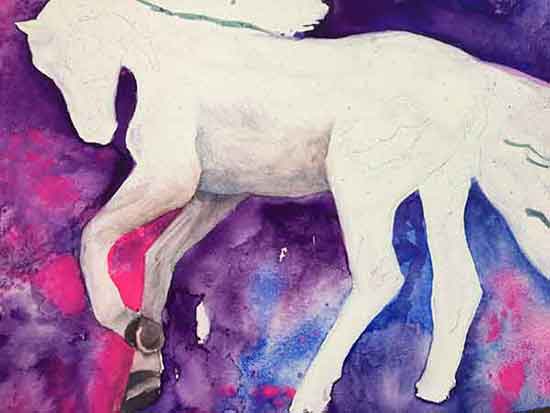 Start painting the shadow areas
Paint the Shadow Areas
We may use purple or blue for the shadows. But blue mixed with the complimentary Burnt Sienna make warmer shadows.
Mix more water with the colors to make them lighter. Use less water for darker colors.
When most painters paint a horse, they will start with the head first. This time the belly came first. Then move on to the legs.
The light is coming from the top left, so there are darker shadows under the belly and on the top of the far legs.
Use the same color mixture with less water to paint the dark hooves.
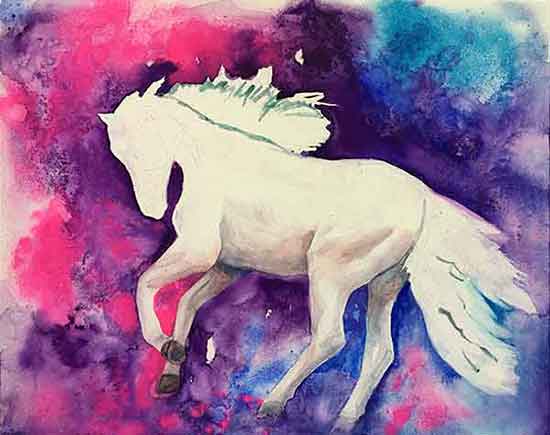 Continue painting the shadows
If you are not totally familiar with horses, keep referring to your reference photograph.
- On the lighter areas like the legs, wet the surface slightly before applying the paint.
- Other areas like the rear haunch, apply the paint to the dry surface.
- Then use a clean, damp brush to feather the color out.
Paint the Tail
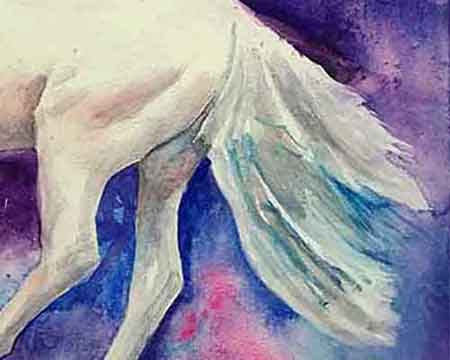
Use a variety of lighter and darker colors. Mix the colors lighter and darker with more or less water.
The paint is applied to a dry surface, so the strokes remain to simulate the hairs of the tail.
The blue in the photo is the masking fluid.
Paint the Mane

Paint the mane with techniques similar to the tail.
Use a variety of colors and stroke in the direction of the hairs. The mane will be darker at the base.
When the paint is dry, remove the masking fluid.
Paint the Horse's Head
There are various ways to paint a horse. And there are different ways to paint watercolor.
You may glaze the color on with several layers of paint. When you are glazing, it's necessary to let each layer dry before you apply the next layer.
More about glazing watercolor.
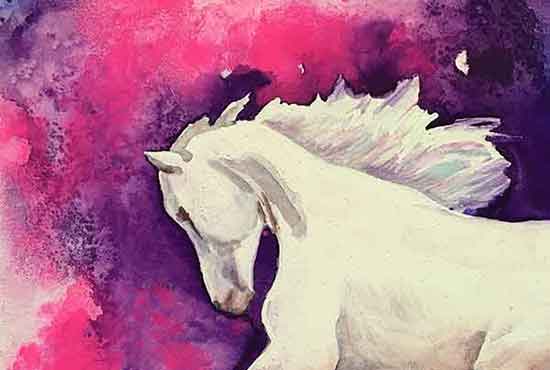 These are the dry stokes before feathering them out.
My preferred method is faster. Apply a stroke of paint to the dry surface. Then use a clean, damp brush to feather out the stroke.
You may paint a horse with a bolder look. In that case, leave the strokes without feathering. It's your choice.
However, you do it is fine. One way is not better than the other. Just have fun painting.
Finish Painting Your Horse
Check out your painting and adjust anything you see. You may soften or redefine areas that catch your attention.
Painting a little of the background colors into the mane and tail help unify the painting.
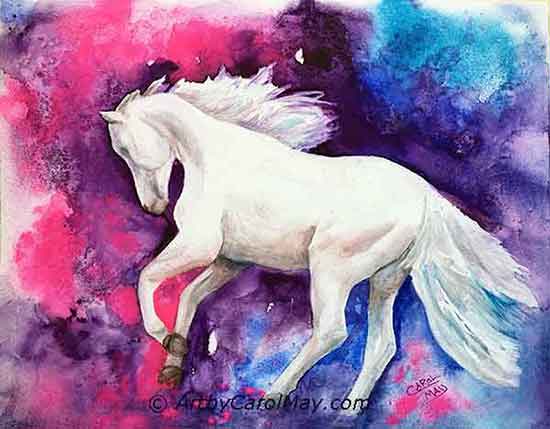 Refine and finish your painting.
It was easy learning how to paint a horse. Things to remember.
- Use a good reference for painting a realistic horse.
- Choose a color scheme with a limited number of colors.
- Keep the contrast high in the focal area.


 Are you eager to learn how to oil paint? What are the essential supplies for oil painting? What do we need for clean-up and how long do oil paintings take to dry? Learn the rules of oil painting and t…
 How do we create a focal point in art? Where do we put the focal point? How do we find the focus of an artwork? Should all paintings have a center of interest or can they have more than one? Learn fro…
 Art elements and principles appear over and over in good paintings. The elements and principles work together for us to create successful artwork. Art principles are the rules that govern how an artis…